Friday, July 18, 2008
Tuesday, July 15, 2008
Monday, July 14, 2008
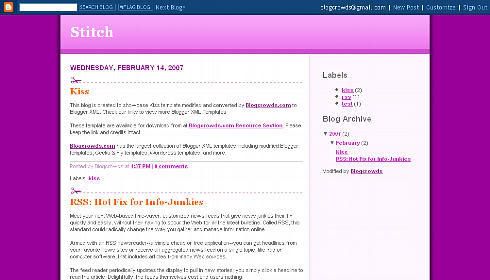
How to Install Template
How to install a Blogger HTML template
នៅពេលនេះខ្ញុំបាទ មានក្ដីសោមនស្សរីករាយ ហើយគិតថា ប្រហែលជាមានអ្នកដែលមានការស្រពិចស្រពិលក្នុងការដាក់ Template ថ្មីក្នុងប្លុក។ ដូច្នេះខ្ញុំក៏បាន យកវិធីខ្លះៗ ដើម្បីងាយស្រួលដល់អ្នកដែលមិនសូវជាបានស្វែងយល់អំពីប្លុកស៉្បតនេះ។
យកល្អ ដើម្បីកុំឲ្យមានបញ្ហា អ្នកគួរតែថតចម្លងកូដចាស់ទុកសិន។
 Make sure you have backed up your template before installing a new one.
1.
Step #1- Backup Your Current Template
 Backup your current Template just in case you make a mistake. This is very important so you can always go back (click on the screenshot to the left to see exactly how this is done). You’ll want to navigate to the “Template” => “Edit HTML” section of Blogger and then look for the “Before editing your template, you may want to save a copy of it. Download Full Template“. Click on the “Download Full Template” and save it somewhere easy to find later on your computer. We are not responsible for any mistakes you make in applying your new Blogger template. Once you have saved this .xml file onto your computer, move on to step #2.
2.
Step #2 - Take a Screenshot of Your Page Elements
 This next step isn’t necessary but I like to do it anyhow. Take a screenshot of your “Page Elements” page just so you know exactly what widgets (Page Elements) you had before applying the new template (an example of the exact page you should take a screenshot of is in the image to the left). If you blow away all your widgets and you don’t remember which ones you had, this screenshot will at least help you remember. If you’re unsure as to how to take a screenshot, then check out this quick tutorial (MS Windows).
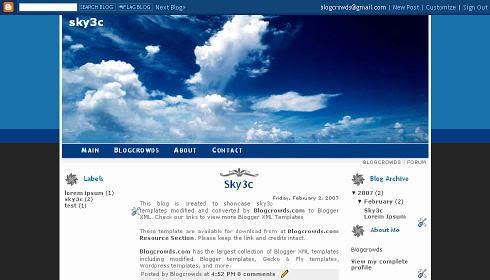
(You can also install a XML template).
3.
You have to choose a Html Template
4.
Copy the code (Ctrl A: Select All, Ctrl C: Copy)
But see in the Image:

5.
Go to your Blogger Control Panel - Edit HTML
6.
Tick on: 
and then past:
Paste the code into the Template area (Ctrl A: Select All, Ctrl V: Paste)
7.
All done!
- Transfer Widgets to New Blogger Template
This process is going to take some careful cut and pasting within the template code so if you’re not comfortable doing this, then I’d recommend just ending on the previous step. First things first, click on the blue cancel button (you should still be on the previous step) that looks like this:![]()
This will cancel out of the new Blogger template you were just trying to upload. Next, we’re going to essentially make a temporary placeholder for your widgets (Page Elements) within your current template. You should still be in the “Template” => “Edit HTML” section of Blogger so if you’re not, go back to that section.
You’re going to actually edit this template code now so pay close attention. Look for the following piece of code which is all the way at the bottom.
Now you’re going to replace that code with the following bit of code:
Save your template and you’ll see this message (which is a good sign):
![]()
 What did we just do? We created a brand new widget (Page Element) in your current Blogger template so we can move all your widgets over to keep them safe! Next navigate over to the “Template” => “Page Elements” section of Blogger and you’ll see a blank new footer section.
Drag all your widgets (Page Elements) that were going to be deleted (we wrote them down or took a screenshot in step #3). The order doesn’t really matter as long as you’ve moved them all down into the widget (top image on left). After you’re done, it should look something like this (bottom image on left):
- Move Your Widgets Back To Their Original Spots
I’m assuming your new template installed without and problems and you’re ready to move your widgets (Page Elements) back to their original spots. This is just the reverse process of what we did before by going to the “Template” => “Page Elements” section of Blogger and moving them out of the footer and back into the sidebar (or wherever you originally had them in your old template).
After you arrange them to your liking, make sure to save and view your blog. If all went well then your blog should be looking the way it did before the new template was applied (well, except for the new beautiful design which is the main reason for this hassle in the first place right?). ![]()
Summary
Congratulations on adding a new custom Blogger xml template to your blog! The whole process should have taken anywhere from 15 minutes to 1 hour depending on your experience and comfort with blog template code, the code quality of the new template, and the number of widgets your blog currently has. Blog designs shouldn’t have to change very often so hopefully this is a one-time process for you. If not, I recommend you bookmark or add this page to your favorites so it’s easy to find the next time you decide to change Blogger templates.
Still Having Problems?
Problems or errors during this procedure? Unfortunately, the Blogger xml templates are very picky and don’t always work with your blog. This can be because of several reasons so it’s not always easy to resolve. Sometimes the best way is to just delete one widget at a time and see if that resolves the issue. Blogger doesn’t give you very good error messages to act on so sometimes it’s a shot in the dark.
If you’ve got a specific case you’d like to ask about, please post a comment below. I will respond and help if possible. Your specific problem might help others address their issue as well.
Labels: Templates
Sunday, July 13, 2008
Links
Previous Posts
- The Art Blog - Blogger Templates
- Folio Plazza, Joomla Portfolio Template
- Aluma Photography – October 2008 Joomla Club Template
- iLife – September 08 Joomla Template
- JA Sanidine – Joomla Online Gaming
- MediaMogul Essentials – RocketLabs Template
- MetaMorph v2 – October 08 Bonus Joomla Templates
- Replicant v2 – October 08 Joomla Templates
- eShop Plazza, Your Joomla Ecommerce Solution
- Webhost Plazza, Joomla Hosting Template
Archives
- 2008-05-18
- 2008-05-25
- 2008-06-15
- 2008-06-22
- 2008-06-29
- 2008-07-13
- 2008-07-20
- 2008-07-27
- 2008-08-03
- 2008-08-10
- 2008-08-17
- 2008-09-07
- 2008-10-12
- 2009-01-11
- 2009-03-08
- 2009-03-15
- 2009-04-19
- 2009-05-10
- 2009-05-17
- 2009-05-24
- 2009-06-14
- 2009-06-21
- 2009-06-28
- 2009-07-05
- 2009-07-12
- 2009-07-19
- 2009-07-26
- 2009-08-02
- 2009-08-09
- 2009-08-23
- 2009-08-30
- 2009-09-20
- 2009-09-27
- 2009-10-04

Subscribe to
Posts [Atom]